After starting Escape Simulator, go to Singleplayer/Multiplayer depending if you’re playing solo or with others. Then, you’ll be able to select the particular Escape Room that you wish to try.
Under the Original tab, select Labyrinth of Egypt, Chamber of the Dead and press play (or double click the image). The game should begin.
Labyrinth of Egypt: Chamber of the Dead
The game will begin after a brief loading screen.
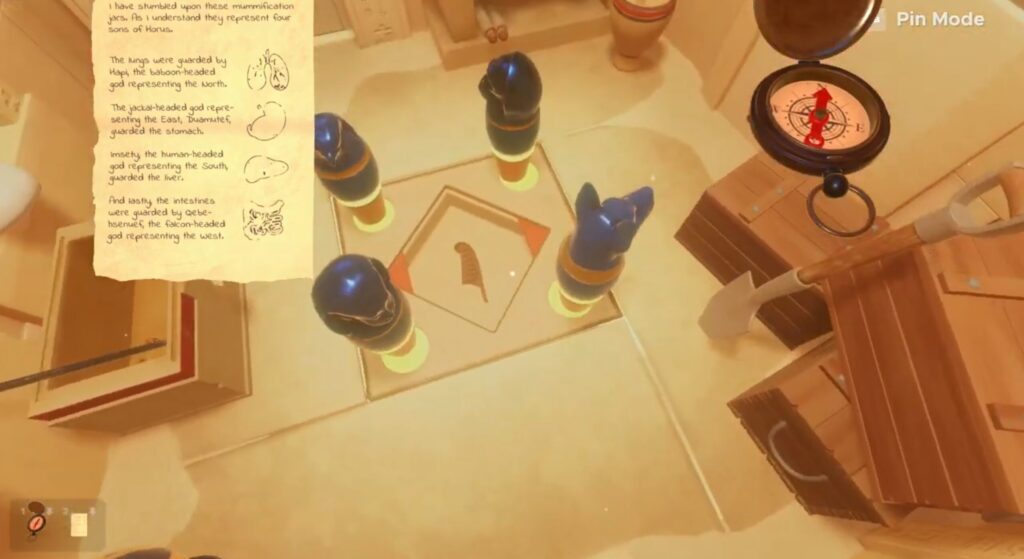
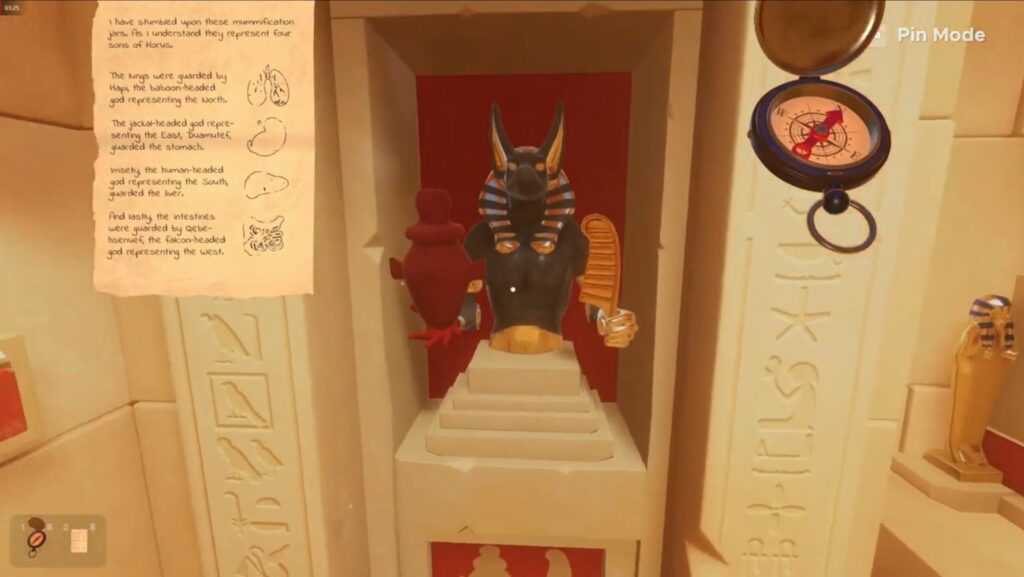
Turn to face the 2 standing sarcophagus.Take note of the pattern of the square shaped puzzle that they are both holding.Find a 3rd sarcophagus, but this one’s lying down. Click on the square shaped puzzle.Drag the scarab around to highlight the path between vertices (the dots). Form the same pattern as the 2 standing sarcophagus.Once the puzzle is solved, the sarcophagus opens and a Heart is revealed. Pick it up.Look around the room, and notice the Anubis statue. There are 2 symbols at the bottom, and the left one resembles the Heart that you just collected.Place the Heart on the open hand of the Anubis statue. It should receive it and lock into place.Back to the opened sarcophagus. After taking the Heart, you should see a double fan symbol. Remember it.Now find a crowbar, which is lying on the ground somewhere in the room.Pick up the crowbar, and use it to pry open the 2 standing sarcophagus. To pry them open, aim the crowbar at the cracked side of each sarcophagus.The left sarcophagus shows a Lion symbol.The right sarcophagus shows a Scarab symbol.With the 3 symbols in mind (Double fan, Lion, Scarab), locate this chest to the right of the Anubis statue. Depress the buttons with the 3 symbols in any order. It should open to reveal a Human Headed Lid. Pick it up.Next, locate these 3 balls and pick all of them up.Move over to the scale with all the other balls.This puzzle basically requires you to find out how much do the 3 red balls weight (they each have different weights), by using the blue balls with known weights. As seen above, the “squiggly line” red ball is the same weight as the blue ball with 2 lines. Thus, “squiggly line” = 2.The “snake” red ball is equal to 1 “squiggly line” red ball + “2” blue ball. From what we know about the “squiggly line”, the weight of the “snake” red ball is 2 + 2 = 4.Finally, the “owl” red ball is equal to the “snake” red ball + “2” blue ball. Thus, the “owl” red ball weighs 4 + 2 = 6.Enter the answers into this puzzle. The number of dots should match the weights of each symbol from the red balls.Solving this puzzle gives you the Jackal-Headed Lid. Take it.Near the weighing scale is a rolled-up scroll. Pick it up and open it.There should be a key inside like this. Click on the key to pick it up.Use the key to open the chest.Pick up the Baboon-Headed Lid.Pick up the note from the Anubis statue (if you haven’t already done so). According to the note, you’ll need to setup the jars in the correct orientation (North -> Baboon + Lungs, East -> Jackal + Stomach, South -> Human + Liver, West -> Falcon + Intestines)You should be able to find a compass like in the above picture. This should help in orientating yourself.With the compass in hand, proceed to place the jars & their corresponding lids onto the 4 circles in the corner of this square platform.Once done correctly, the center platform will open to reveal a fan. Pick it up.Place the fan on the other hand of the Anubis statue to finish this level.Congratulations, you have solved Labyrinth of Egypt – Chamber of the Dead!